Pages

Showing posts with label DIY. Show all posts

Friday, February 7, 2014

Reed is Dino-Mite!

First and foremost, I can't even believe that my baby is 2 years old already. (Don't even get me started on my 6 year old) 

For Reed's party we decided to do a dinosaur theme because he really likes to play with the ones we have at home. Let's be honest, it's super cute when he roars too. :)

So I got to browsing Pinterest and found THEE CUTEST dinosaur tail I have ever seen. Then I found a super cute shirt I could do with Chase.  Now I'm not going to do a tutorial on these because there's no reason to. Here's the link for the Dinosaur Tail and Dinosaur Spiked Sweatshirt.

Now, I am the first to admit that sewing is not my strong point. I actually sew more on paper than I do on fabric. :) The hoodie was SUPER easy and the tail wasn't too bad. 

Here's how they turned out:


So cute right?!

I found these dinosaur hats at Dollar Tree of all places, and a lot of other little things for the treat bags and such.


I had these chalkboard labels from a couple years ago. I added them to cardstock and  wrote Herbivores and Carnivores next to the food.


We had Dino eggs (Grapes) and Dinosaur tails (Carrots and celery sticks) along with Dinosaur chicken nuggets. We also got a 3 foot sub.


I also had the boys' dinosaur toys and books around the tables for decoration. 

Here's a video of the night:


Thanks for stopping by!


Monday, January 13, 2014

Valentine's Day Mantel

Hello all!
So I finally have all of our Christmas decorations down and put away and now everything is bare and sad looking. So I decided to get a head start of some Valentine's Day decorating!


This heart banner I made using a tutorial I found through Pinterest HERE


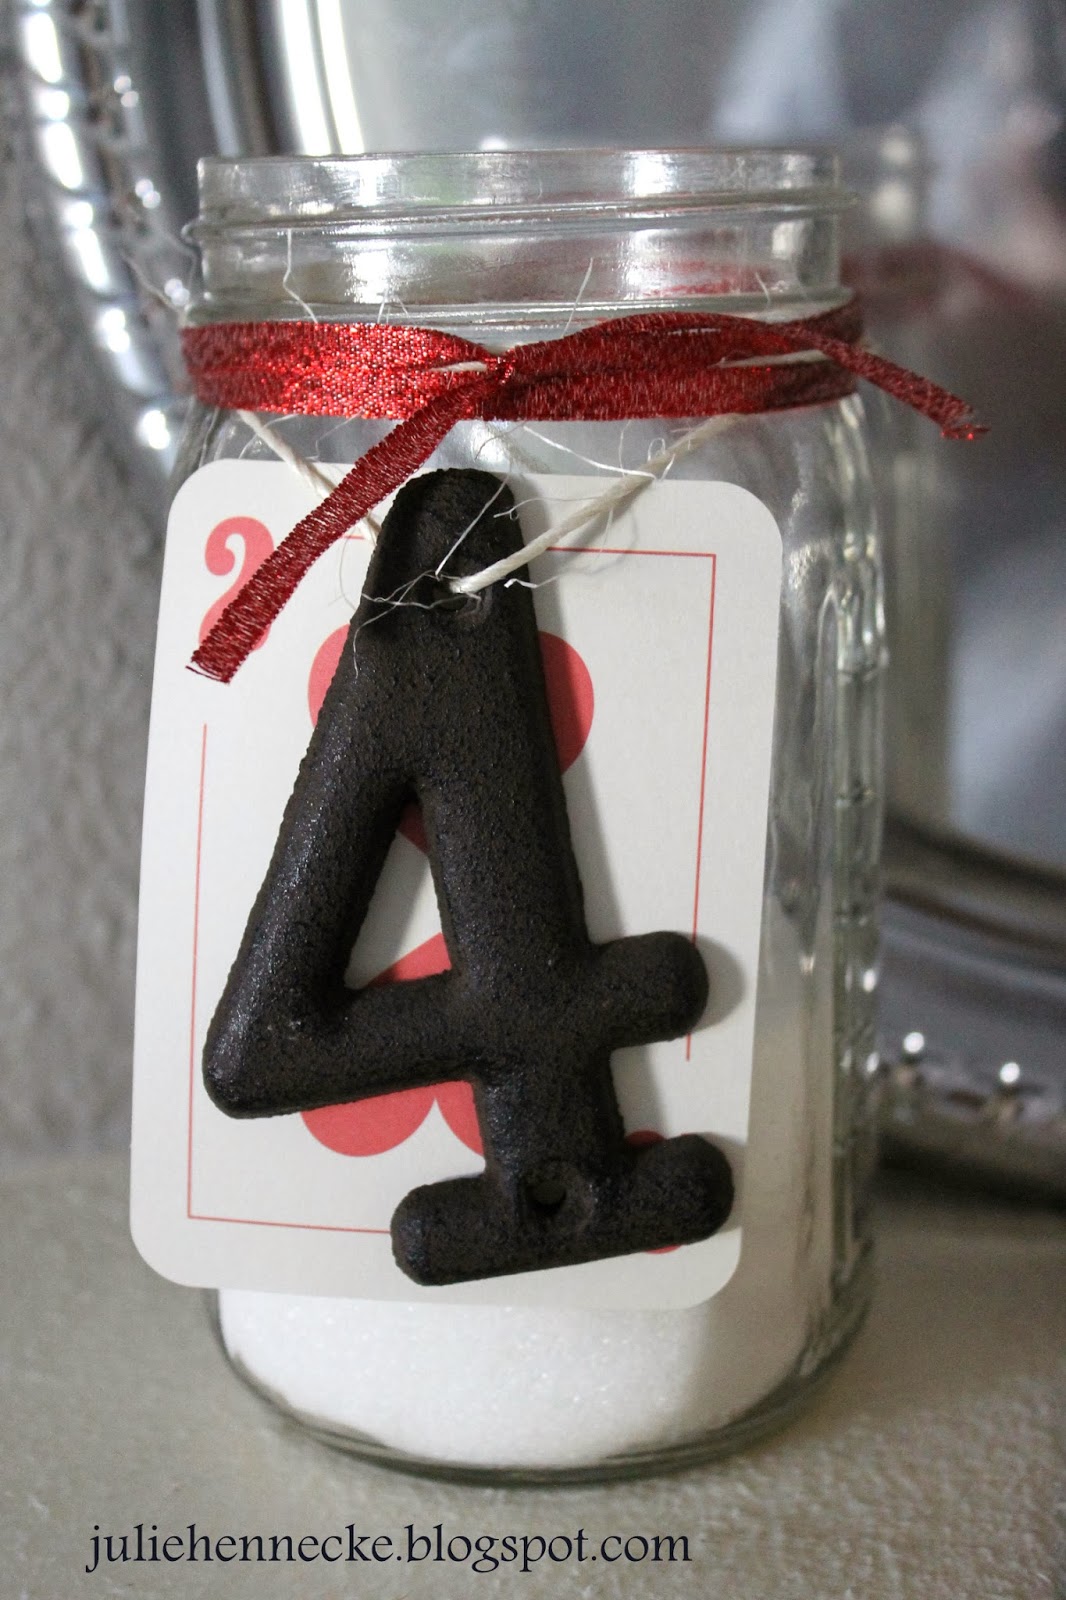
I used this card from the Kraft Edition of Project Life to put behind the 4. I also added some ribbon to the top of the jar.


I used some old scrabble times and glue dots to put in this frame. 


I put one of our engagement pictures in this frame and added a ribbon to the candle. 


I also put up this Willow Tree figurine. This is called Promise.


This banner I made with just some scrapbooking supplies. 


The red and white polka dot cards are again Project Life cards from the Kraft Edition. The alphabet cards are from a pack of cards from BazzillBets. Old cards that I don't even think are available anymore. 


So there we go! 

(If you want to check out how I decorated the mantel for Christmas and the Fall, check that out HERE and HERE)


Tuesday, October 15, 2013

The Boys' Room!

I really wanted to get a post up on the latest Project Life I've been up to, but the last 2 days have been pretty cloudy/rainy. (Hard to get good pictures) So it will just have to wait for another day. :)

So INSTEAD you get a grand tour of the boys' room! Yay!

I gave you a little sneak peek HERE

We've been in this place 6 months and I finally feel like their room is done. Go figure. :)


The view from the door. 


Mr. Reed's hangout


This sign I made the Summer after Reed was born. I wish it was a little bit lower but little hands seem to cause trouble. :) Seriously just a couple of old boards screwed together. I just used some foam letters and white acrylic paint to stamp my favorite brother quote on.

"Sometimes being a brother is even better than being a superhero."  :)


Chase's "book nook" (and sometimes Reed's too) 


The silhouette printout I bought off of Etsy HERE
The little Route 66 box is from Hobby Lobby and the globe I got off of a facebook consignment group.


Chase fun hangout. This loft bed we got for Chase for his 4th birthday. It originally came with a slide attached to the left side, which he absolutely LOVED. Unfortunately soon after Reed came along (7 months later) we had to take it off so that Reed's crib could fit in the same room. They both enjoy hanging out underneath with a sheet or towel hanging from the rod. :)


This little project is what I've been wanting to work on for the last couple of months but just never got to it. My parent's recently moved out of their house that they've been in for over 20 years and my dad had most of these license plates in his garage.

I bought a sheet of plywood that was 2' X 4' and attached the plates with liquid nails. We attached it to the wall with anchored screws. 


Here's the clipboard wall that I use to hang pictures and projects the boys have made.


And then here's the wall with both closets. I hung a framed picture of each boys' hospital picture here.


This little table is the other project I have been working on. I painted it red and we keep all of Chase's Autumn/Halloween/Thanksgiving books under there right now. On top is the holy sound machine that my boys would probably never sleep without. Not kidding. If your kids have to share a room, this is a complete life saver. Or sleep saver, whichever. :)


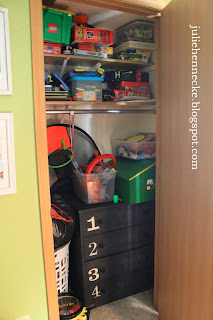
Here's a couple shots of inside their closets. It looks a little messy but it's actually pretty organized. The one of the right is mainly the toys closet. It houses all of Chase's puzzles, board games or anything that we don't Reed to get into unsupervised on the shelves.
The chalkboard painted dresser houses most of Reed's clothes.

The left closet has any leftover toys on the shelf but it's mostly clothes. Any bags you see are clothes that are either too big or too small right now and then I hung an extra rod so that Chase could reach his clothes on the bottom and still fit Reed's shirts also.


I think we got this thing at Target. It has a hook on each side to hang from the top rod. Pretty cool. 

So anyways, there is the boys' hangout. Where they sleep, play and have become the best of friends. Well, most days. :)




The Shabby Nest

Monday, August 12, 2013

Living Room Sneak Peek

Hey all! I thought maybe I should post a pic or two of our fireplace mantel. You know since Summer is almost over (sad-face) and I'll be changing it come Fall.

We are lucky enough to have a fireplace. It's inevitable that colder weather is going to be here before we know it and I can't wait to use it! There are only 2 problems I have with it and both are unchangeable. 1) It's a beautiful shiny brass. Yuk!  2) It's a corner fireplace, which you would THINK would make it easy to arrange furniture around. Alas, it is not. BUT more on that in a later post. :)


So to start, I put my huuuuuge and HEAVY  mirror vertically so that it draws the eye up. And then to help with that I bought these natural sticks/feathers/good smelly stuff at Wal-mart to add to a vase. (Vase is from Hobby Lobby)
 
To balance that out a little I put this candleholder that I bought off of a consignment group on Facebook on the opposite side. The frame print is something I've had for a long time, printed off the internet.  HERE


I have to admit I am addicted to mason jars. I have a huge stash of them that I use around the house. Just put some sugar in this one and a small candle on top. These old books I bought at Goodwill. LOVE them. I didn't even look at the titles of them when I bought them. I buy books for color not content. :) 
Turns out the brown one is an old church hymnal. Super cool.


So that is that. I also got my "gallery wall" finished the other day.


I think I still want to add to it but this is how it looks right now.


BTW the paint color for the wall is called Nimbus from Benjamin Moore (BEST COLOR EVER)


So that's it for now! I am really hoping in the next couple days I can get more done in the living room. 
My baby heads off to Kindergarten tomorrow, so I'm thinking maybe I'll get more done around the house.....right???? Doubt it :)

Tuesday, July 9, 2013

Printing pictures for Project Life

Hi everyone!

So I have been getting caught up on my Project Life and so excited to show you. I seriously need to print out a handful of pictures and then I am completely caught up! Whoop whoop! :)

As I was setting up my pics to be printed I thought I'd kind of take you through my process of how I pick which pictures to use and how I have them printed to fit into the PL page protectors.

I usually try to sit down once a week and print off a batch of pictures for the week because:
 A) It's cheaper that way
 B) it helps me stay up-to-date

First things first. I ALWAYS use Walgreens to print my pics. I have never had a problem with them or their processing/quality and it doesn't hurt that they are just down the street from me  ;)  {Also, a friend of ours is the manager of the photo dept. Not gonna lie: it's pretty sweet that I can just walk in and they have my order waiting for me. :) }

The first thing I do is just go to Walgreens website and upload my pics. I do NOT pre-plan which pictures I'm going to use. I literally just go through and click on the ones I like. I have tried in the past to pre-plan what pictures for what pocket and it is waaaay too stressful and takes too much time.


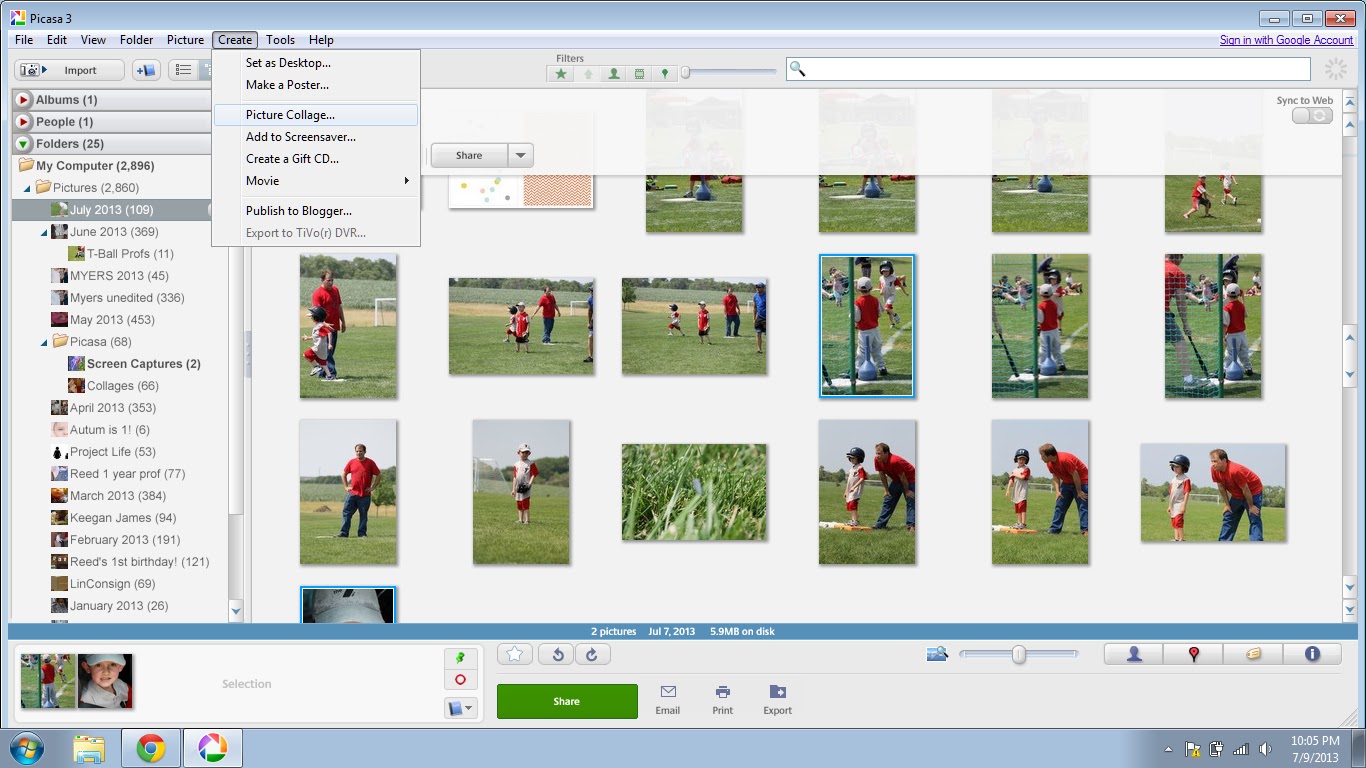
The page protectors I use have pockets for 4 4x6 horizontal and 4 3x4 vertical pictures/cards. Because of this, I need to change the size of my vertical pics to 3x4. Insert Picasa photo editing.  I ALWAYS go through picasa to import my pictures off my memory card, and then do any light editing that needs done. THEN I go to Photoshop Elements if I need to.

Obviously 2 vertical 3x4's equal 1 horizontal 4x6 so what I do is make a picture collage of 2 vertical pictures that I want. Let me show ya:


What you have to do is pin (Click on the picture you want, then click on the little green push pin) the 2 verticals you want to use down in the tray at the bottom. Then click on Create, at the top of the screen, and pull down and click on Picture Collage.


You have to make sure that under settings you have Grid selected, the drop down menu has 4x6 small print selected and a horizontal collage is selected. Then click on Create Collage. Simple right?

OK now go back to Walgreens Photo Center and find the pictures that you just used to make a collage. Delete them. I know it's hard but it's what ya gotta do. :)


Now go back and upload the collage you just made. It will be in a folder in your pictures named Picasa. Then usually a subfolder called Collages. Complicated, I know. :) If you didn't change the name of the collage it will be named the name of what folder the pictures came out of. My pics were in "July 2013" so it named the collage July 20138. {I have quite a few collages from July. 8 to be exact ;) }


Now add all those pictures to your cart and checkout!

When you get home you just have to use your paper trimmer, or scissors if you have a steady hand, and cut it right down the middle to make 2 3x4s.

I hope that all made sense. I feel like I typed a lot and I'm not sure it all came across right. If you have any questions don't hesitate to comment down below and I'll do my best!

Stay tuned, as soon as these pictures are picked up I will be totally caught up! :)

Thursday, June 20, 2013

Getting in the holiday spirit!

Hello hello! It's me again. :)

Sooooo 4th of July is fastly approaching which brings back so many memories for our family. Exactly 2 weeks after the 4th my firstborn was born. It seems like so long ago looking back but at the same time seems like yesterday!

I have been trying to find some crafty things for this "said firstborn" to do during these summer months, to keep us all from going stir crazy since it's really starting to get hot outside now.

I found this super easy (and cute!) project to do that helps us all get excited for the 4th of July.

All you need is some blue and red paint, a brush and a plain white t-shirt!


All you need to do is paint your child's hand blue (Chase's favorite part):


and then stamp it onto the t-shirt in the top left area.


Next paint on some red stripes. You can be as perfect or freestyling as you want. I happened to have some painter's tape laying around, so I used that to give Chase some guidelines to paint on.


I added some lettering on the bottom so we would remember what year. 


So easy, a caveman could do it. Ha. Anyways I'm going to make one for Reed too. (I have to coordinate them while Chase still thinks it's cool to dress alike :) )


Got leftover paint? Creative painting time! :)


This little painter is going to be 6 in less than a month.  And whether I like it or not, he's heading to Kindergarten. He sure is cute isn't he? :)


So there you be! Go out and paint something! 


Helpful hint: If this is a shirt you're going to want to be able to wash and wear many times over, it would be a good idea to use fabric paint.