Pages

Showing posts with label Project Life 2014. Show all posts

Friday, February 21, 2014

Project Life: Weeks 4 and 5

Welcome back! Time for another installment of "Julie's Project Life".

haha. Yeah. OK...


Week 4:


I didn't have many pictures for this week so I did a one page layout.


Super simple title card that looks more difficult than it is. It's just a 4X6 card from Project Life's "Kraft" edition. I added a 3X4 card horizontally to put the camera sticker on. I just sewed around it. Then I put a leftover scrap of blue striped paper to put the week stickers on. The "5" is actually a blue sticker that I colored black. Added the date stamps and that's it.


I wanted to show you how easy it is to customize your cards for whatever your purpose. This striped paper is actually the back of the card I made for Reed's birthday party spread. HERE  I thought it would have been fine to use if only the stripe was red instead of orange. So I got out my red washi tape and cut it in half and covered the orange stripes. Easy.

Week 5:
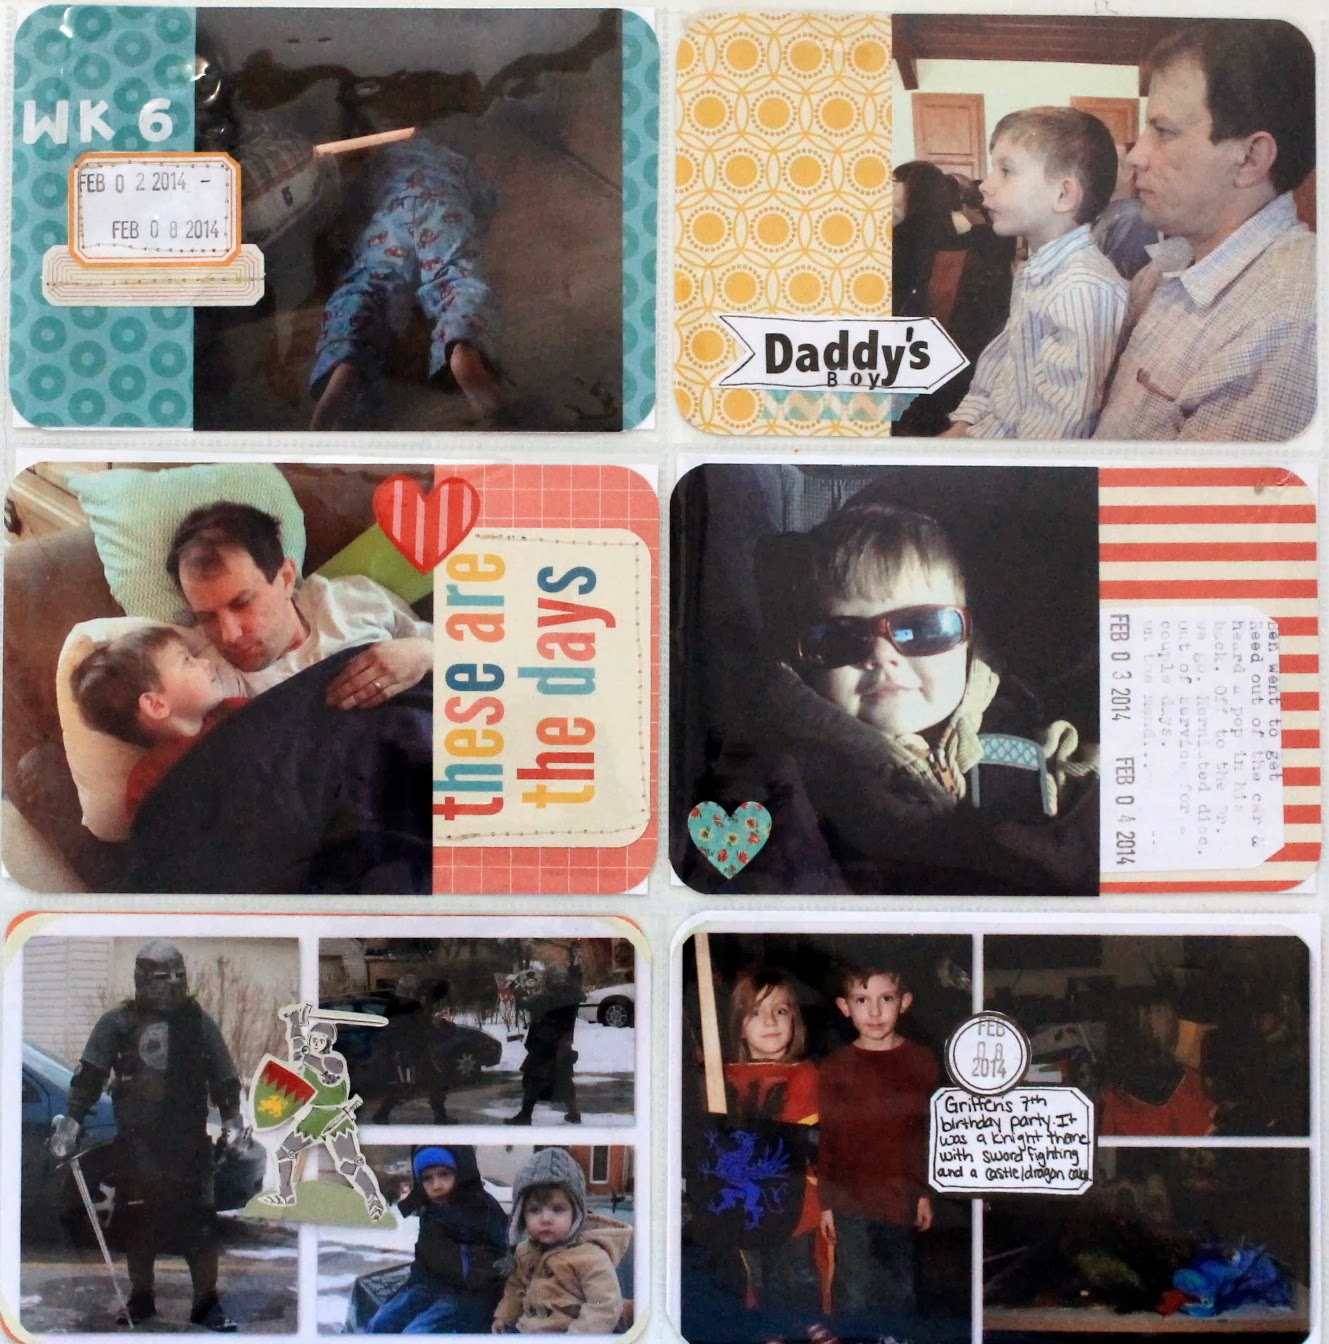

For this week I used only the "Kraft" edition again. 


This title card was actually a mistake. I had forgotten to leave a pocket open for a title so I just added some letter stickers and elements on top of this picture.


I turned a 3x4 card horizontal and tucked it under a picture and then sewed it down.


For this card I made a banner (Check out how I did that HERE) and just anchored it with a bit of teal washi tape.


The bottom 2 pockets are both picture collages I created so I could fit more pictures from my nephew's birthday party. I used this little knight that my SIL had in the take home treats. It was actually attached to a toothpick and so I just twisted it to get it to come off of it.


There you go! Weeks 4 & 5 are in the books, literally. :)


Tuesday, February 11, 2014

Project Life : Reed's Party

As I posted HERE, we celebrated my son's birthday about a week and a half ago. Here are the pages I made for the Project Life version of it. :)


Left side:


I tried to use the typewriter to type on this picture. It turned out OK. Not as dark as i was hoping though.


Right side:


I got the birthday printable HERE


Insert:


That's all for now! Have a good one :)


Linking up: Snap Creativity

Tuesday, February 4, 2014

Project Life Week 3

How is everyone on this beautifully cold, snowy morning? 

The best thing about these freezing cold days? More time for crafting. :)

Here's week 3:

(Left side)


For this week, I had enough pictures for a 2 page spread. 


Quick tip: if you don't have enough room for a title card, use one of your pictures instead! I just used some letter stickers to put the week number in the white space of my photo. I used a photo safe marker to add a somewhat straight square around it. I added a strip of paper to stamp the dates on and a piece of washi tape to ground it. So simple and easy.


I added a label sticker to add journaling to a picture and then cut out a tag out of cardstock to add journaling for another picture. For Christmas my husband bought me an old typewriter so I've been trying to use that more in my pages. I also am trying to add sewing more. 


For this pocket I used my visitor sticker from visiting my cousin in the hospital, and added a journaling card behind it. Of course I added a picture of their sweet baby with it.

(Right side)


This week I had some pictures of my youngest from hanging out at home and then my oldest was home sick one day. We've been having some crazy  weather here lately and so I took a screenshot of the wind gusts from our local TV station. 


This card is from We R Memory Keepers. I just added the date and  a small sticker. 


This little collage, I just used a label, some letter stickers and leftover piece of washi tape. 


That's all for today! This last weekend we had my youngest's birthday party so I'm starting to put together a post about all the fun and crafty things I incorporated into that. Stay tuned!


Tuesday, January 28, 2014

Project Life Weeks 1 and 2

It's that time again!  I wanted to just point out a couple things that I have decided to do different this year with my Project Life layouts. First, I'm going to try really hard to make a title card for every week. I started doing this last year but got bored with it so I would only do this once in a while. It's so much easier to keep track of when you have a title card for each week. Second, I'm going to try and use a corner rounder for every insert. For those of you that are die-hard Project Lifers, you know that the Becky Higgins Project Life cards/kits all have rounded corners and I thought I'd give it a try.


Week 1:


2 things about Week 1. I literally took only a couple pictures from January 1st - 4th. So I decided to have my first week be January 1st through the 11th. Even with all those days together I still had very few pictures, so I did a 1 page layout. 


Here's the title card. I found this "Hello January" picture on Pinterest HERE.


On this card I used a tag from my son's shirt to use as an accent.


I made this little collage using some accents from Heidi Swapp.


Week 2:


For this week's title card I made a 3X4 card because that's what I had room for. 


This little heart is from a collection from DCWV.  Not only does it have an adhesive back, but it also has a fabric texture to it. 


This camera is from the same collection. LOVE them!

So that's all for now. I have week 3 done, look for that later this week!


Saturday, January 11, 2014

Project Life 2014 Title Page

This week I have been one crafty gal! I made a couple "costumes" for my 2 year old's birthday party, I got my Valentine's Day mantle put together (Look for that post early next week) HERE and I managed to get my title page done for PL!

Title page:


I sewed on this little tag and added stickers spelling "Reduce" which is my one little word for this year. For more info on One Little Word click HERE


I put these little tags on each of our pictures. They are the first letter of our names and our ages for this year. I got this idea from Ali Edwards.


I decided to add our cats to my page this year. The Hennecke card I cut out the middle and glued some plastic wrapping behind. I then added the stickers and sewed a piece of patterned paper on the back so it would look kind of 3D. 


I found this card on Pinterest from HERE


I sewed on these little flags that I found at Michael's 


That's it! Stay tuned for more....